Installation, first time configuration and updating
Writing the firmware to SD
The SPIDR4 firmware requires an SD card with a capacity of 4GB to 32GB. A speed-class of 10 or higher is advised for quick boot-up. Use an empty SD card to prevent loss of data.
The SPIDR4 firmware can be downloaded from https://spidr4.nikhef.nl/restricted/releases/firmware. It is also possible to directly flash to the SD using a firmware update file link (File name ending in .img.zip). Please skip to section ‘Flashing with Balena Etcher’ if you are using this method.
Once downloaded, extract the archive to some location on your system. Once extracted you will find there 3 files:
README.md - A readme file
spidr4-firmware-{version+hash}.img.zip - The SD card image
spidr4-firmware-{version+hash}.zip - Raw files (expert use)
We can use the file ending with img.zip to flash an SD card. Though it is possible to flash on an SD using dd, for non-experts, we advise Balena Etcher.
Flashing with Balena Etcher
Please download Balena Etcher from:
Once installed, start the application, and insert an empty SD card and start Etcher.
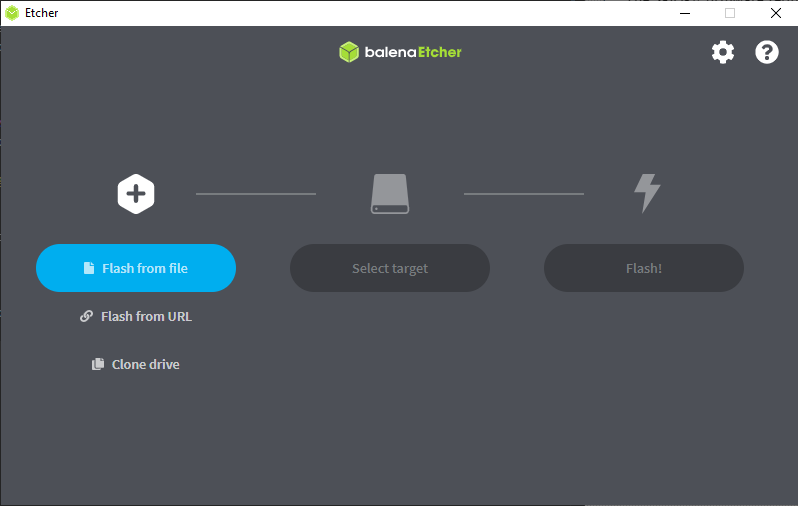
After starting Etcher you will be greeted with the following screen:

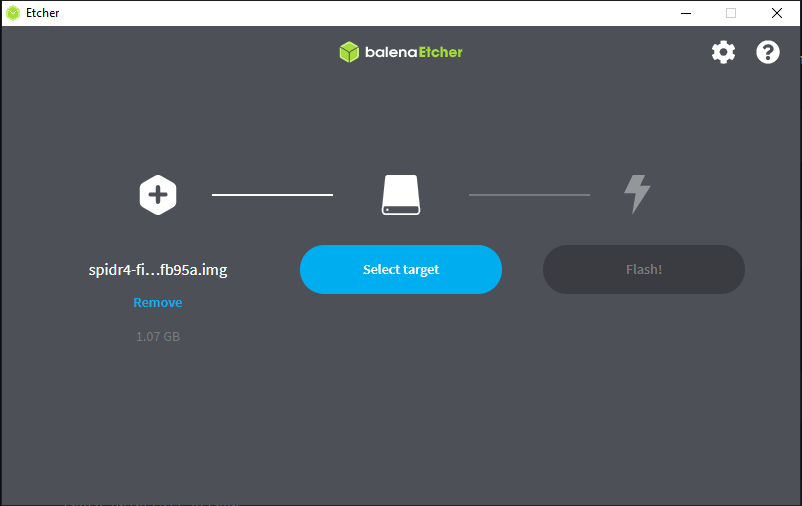
If you are using the downloaded and extracted achive, proceed by clicking ‘Flash from file’ and selecting the spidr4-firmware-{version+hash}.img.zip file (No need to extract the .zip file), and click ‘Open’. The file should now be loaded.
To flash directly from a URL click ‘Flash from URL’. Paste the firmware update URL which should look like https://spidr4.nikhef.nl/restricted/releases/firmware/spidr4-firmware-{version + hash}.img.zip. From remote you may need to fill in your spidr4 username and password in the authentication box. Click OK when ready.

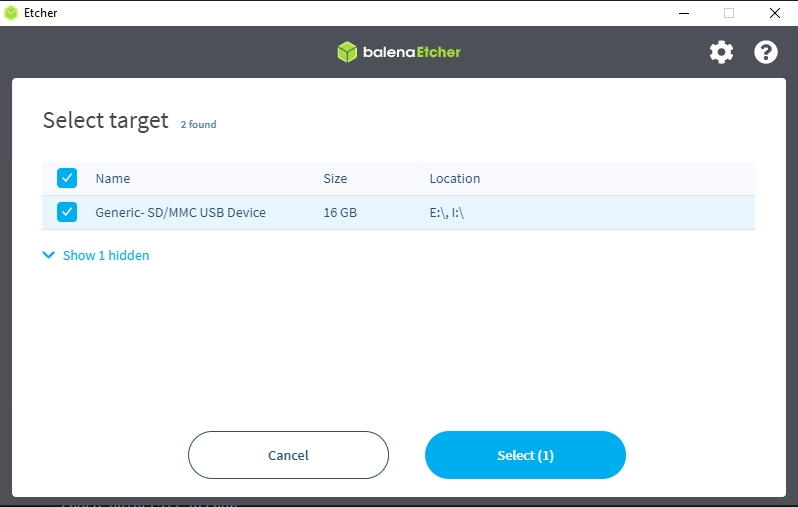
Next select a target SD card, and press ‘select’

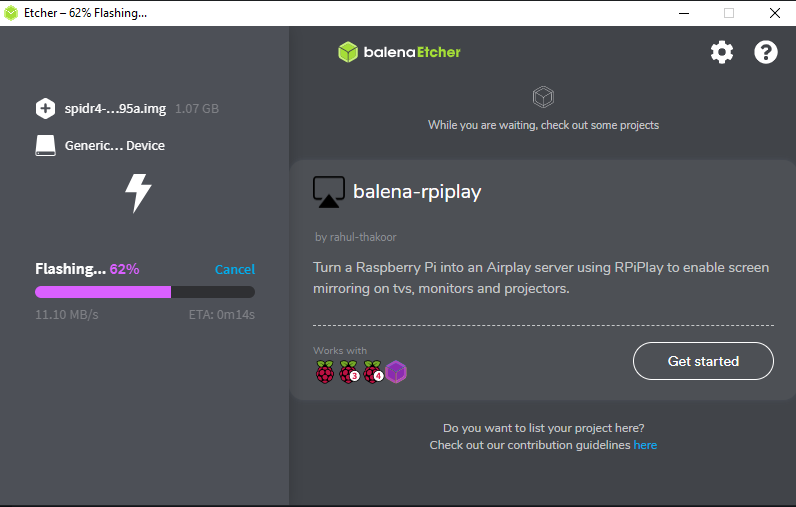
Finally, you can press the ‘flash’ button, and the system will start flashing the firmware on the SD card.

Once completed, insert the SD card in your SPIDR4 module, and the firmware should start. Make sure the SPIDR4 is connected to your network or local system.
Configuring the SPIDR4
By default the SPIDR4 uses zeroconf (also used for Apple Bonjour) to make itself findable on a network. SPIDR4 attempts to get an IP address for both IPv4 (DHCP) and IPv6, but also has a default IP address 192.168.199.10.
To configure the SPIDR4 you will need to install the SPIDR4 management tool. But first some prerequisites need to be installed. The tools require python 3.7 or higher, and for the remainder it is assumed python and pip refer to the Python3 package. For simplicity it is also possible to use a virtual environment using pyenv or conda.
Download and install spidr4py, the latest version. Download here:
Directly install it as follows:
pip3 install https://spidr4.nikhef.nl/releases/spidr4py/spidr4py-x.y.z-py3-none-any.whl
Where x.y.z is the version, 0.8.0 being the latest as of this writing.
Additionally install the spidr4mgr tool from https://spidr4.nikhef.nl/releases/spidr4mgr
pip3 install https://spidr4.nikhef.nl/releases/spidr4mgr/spidr4mgr-x.y.z-py3-none-any.whl
Where x.y.z is the version, 1.0.3 being the latest as of this writing.
If all went well you should be able to run the spidr4mgr tool:
spidr4mgr
which should provide you with help, like this:
Usage: spidr4mgr [OPTIONS] COMMAND [ARGS]...

Options:
  --help  Show this message and exit.

Commands:
  check     Diagnostic tools
  info      Get information about spidr4 and attached pixelchips.
  list      Search and list all reachable spidr4 systems on the network
  log       Outputs logging from the SPIDR4 module.
  net       Network related configuation
  reboot    Reboot the spidr4 module.
  sense     List sensor values.
  shutdown  Shutdown the spidr4 module.
  update    Update the firmware
  version   Prints the version of the manager
Depending on the network the SPIDR4 can be found automatically using command list.
$ spidr4mgr list
1: spidr4-2874d097 (at address(es) [2001:610:120:3000:8234:28ff:fe74:d097], 192.16.192.232)
However, not all networks propagate the multicasting required for this to work. For this reason the SPIDR4 has a backup IP address 192.168.199.10.
To check if you can connect to the SPIDR4, use command info:
spidr4mgr info <index or host>
Where index is the index of the SPIDR4 when it was found with spidr4mgr list. The numerical index value at the start of the line can be used (1 in the example above). Alternatively you can also use the hostname or IP address.
$ spidr4mgr info 192.16.192.232
Version info:
* SPIDR4 Control is 0.0 (git-info=master-a7e50db)
* SPIDR4 Firmware is 1.0 (git-info=v1.0.10-62-0bb778a)
Spidr4 serial: 100080342874d097
Spidr4 has 1 pixelchip(s) attached:
* Position 0: TIMEPIX4 revision=2 id=00000000
If you can’t find the SPIDR4 on the network, you can connect it directly to a PC to configure it. Your local network configuration should use IP address 192.168.199.x where x can be 1 to 254, excluding 10. Netmask should be set to 255.255.255.0.
You should then be able to PING the SPIDR4 on address 192.168.199.10.
We also encourage the use of IPv6. The automatic network addressing of IPv6 allows recovery of the SPIDR4 even in case of IPv4 misconfiguration.
Changing the network configuration
To view the current network configuration use, spidr4mgr net show <index of host>, for example:
$ spidr4mgr net show 1
IPv4 configuration:
* Address: 192.16.192.232
* Netmask: 255.255.255.0
* DNS    : []
IPv6 configuration:
* Automatic
To change the network configuration you can use spidr4mgr net config <index of host>.
First to see all options, use --help:
$ spidr4mgr net config --help
Usage: spidr4mgr net config [OPTIONS] HOSTNAME

  Configure networking. Hostname can be either the name of the spidr4 module
  (e.g. spidr4-12c356e9), an IP address or index. For index, see spidr4mgr
  list, number before found spidr4 is the index.

  For IPv4 you can configure primary IP addressing using the options below. In
  addition there are two alternative methods which allow finding of the SPIDR4
  module:

  1)  A static backup IP which is always 192.168.199.10. This can be disabled
  using --no-backup

  2)  A self-assigned zero-conf address. To use this please make sure routing
  of 169.254.x.x also includes the SPIDR4 module. This can not be disabled.

  IPv6 assignment can be either auto (default) or static.

Options:
  --static4 IPV4       Add static IPv4. May also use CIDR notation, otherwise
                      use --mask4. Can't be used together with --dhcp4
  --mask4 IPV4         Supply netmask, notation like 255.255.255.0 (only
                      useful with --static4)
  --gateway4 IPV4      Supply IPv4 gateway (only useful with --static4)
  --dhcp4              Use DHCP for IPv4. Can't be used together with
                      --static4
  --static6 IPV6       Add static IPv6 (Can't be used with --auto6)
  --gateway6 IPV6      Supply gateway (only with --static6)
  --auto6              Use automatic IPv6 assignment (Can't be used with
                      --static6)
  --dns IP             Add multiple DNS servers, can be both IPv4 or IPv6
                      addresses.When using DHCP it is assumed the DNS servers
                      are provided by DHCP
  --backup_ip BOOLEAN  Enable/disable the usage of the back-up IP
                      192.168.199.10 (only for --dhcp4)
  --help               Show this message and exit.
For example, to change the IP address of the example SPIDR4 from static to dynamic:
$ spidr4mgr net config --dhcp4 1
Applying new network configuration...

$ spidr4mgr list
1: spidr4-2874d097 (at address(es) [2001:610:120:3000:8234:28ff:fe74:d097], 169.254.9.20)
As can be seen the DHCP server now has assigned address 169.254.9.20 to the SPIDR4 system. To change back to a static IP use --static4:
$ spidr4mgr net config --static4=192.16.192.232/24 1
Applying new network configuration...

$ spidr4mgr list
1: spidr4-2874d097 (at address(es) [2001:610:120:3000:8234:28ff:fe74:d097], 192.16.192.232)
Note that applying a new network configuration may take a bit of time.